
Class A theory course · chapter 6 of 19
Manoeuvring — low speed, starting and stopping
Setting off, changing gear and stopping, the low speed where self-balance is weakest, and hill starts and obstacles in the road.
The chapter in numbers
- Lessons
- 3about 14 minutes of reading
- Drawings
- 6diagrams and photographs made for the lessons they sit in
Why this chapter
Low speed is harder than it looks: it is where the machine is least stable. This chapter covers setting off, changing gear and stopping, riding at walking pace, turning round and parking, and hills and obstacles in the road – the basic handling everything else is built on.
Written against
The lessons are written against these sources, and the explanations cite them.
- Læreplan klasse A2 (V850a2) pkt. 2.2.4 og 2.2.5
- trafikkreglene § 8 nr. 1 og § 14 nr. 2
- temaliste klasse A1, A2 og A
- trafikkreglene § 11 og § 2 nr. 3
- Læreplan klasse A2 (V850a2) pkt. 2.2.5 (igangsetting i med- og motbakke) og 2.2.6
- temaliste klasse A1, A2 og A – manøvrering
What the test asks
The practice questions for this chapter belong to 2 of the seven official themes of the theory test.
- The vehicle207 practice questions · 5 of 40 in our mock exam
- Speed & positioning277 practice questions · 7 of 40 in our mock exam
The mock-exam split is our own – Statens vegvesen publishes none.
The lessons, in order
- 1 Setting off, changing gear and stoppingThe clutch, the gear pattern and the stop — what step 2 calls basic vehicle handling. 4 min
- 2 Low speed, turning round and parkingWhere self-balance is weakest: walking pace, turning round, wheeling it — and a machine that has to stand on one leg. 6 min
- 3 Hills and obstaclesPulling away uphill without rolling back, riding down a long hill without cooking the brakes, and crossing a lip without losing your balance. 4 min
The lessons are part of full access – 139 kr for a week, 199 kr for a month. Chapter 1 is free, so you can see how the course is written first.
All 19 chapters
- 01The motorcycle and the licence
- 02The motorcycle — construction and systems
- 03Clothing and compulsory safety equipment
- 04The motorcycle safety check
- 05Forces, balance and braking
- 06Manoeuvring — low speed, starting and stopping
- 07Positioning and cornering
- 08Observation, where you look, and being seen
- 09Grip, weather and road conditions
- 10Signs, markings and signals
- 11At a traffic accident
- 12The traffic rules and the rider's duties
- 13Motorway, tunnel and level crossing
- 14The rider's and owner's responsibility
- 15Risk, attitudes and riding strategy
- 16Giving way
- 17Speed, distance and overtaking
- 18Environment and consideration
- 19Passenger and load
Read the whole chapter
Full access opens all 19 chapters, mock exams with new questions every time and the sign drill – 139 kr for a week, 199 kr for a month, no automatic renewal.
Setting off, changing gear and stopping
Manoeuvring is one of the two themes on the class A1, A2 and A list that is not on the class B one. The reason is simple: a car driver who lets the clutch out too fast gets a jerk, while a motorcyclist doing the same thing loses balance. On two wheels, vehicle handling and safety are the same subject.
Setting off
- Before you pull out from the kerb: check the mirrors and over your shoulder, and signal. You must give way to traffic in the lane you are moving into.
- Machine in first gear, clutch in, and the rear brake holding it still.
- Let the clutch out to the friction zone — the point where the machine starts wanting to move.
- Add a little throttle, release the brake, and let the clutch come the rest of the way as it rolls.
- Feet up on the footrests as soon as you have speed enough to balance.
- Look ahead, where you are going — not down at the instruments or the tarmac in front of the wheel.
Changing gear
The gear pattern is almost always the same: one gear down from neutral, and the rest upwards. Neutral sits between first and second — convenient when you are stopped, inconvenient if you go hunting for it while moving. Gear is chosen by engine speed and by what is coming next, not by road speed alone.
One down and the rest up, with neutral between first and second.
- Upshift: throttle off, clutch in, lever firmly up, clutch out and throttle on again — in one smooth movement, so the machine does not pitch.
- Downshift: the revs must suit the lower gear when the clutch comes out. A small blip of throttle while the clutch is in keeps the speed the same before and after, and spares the rear wheel the jolt.
- Hold your line while you shift, and choose the gear for the speed you have and the hill ahead — not for the gear you were in.
Stopping
- Pulling in at the roadside: mirror and shoulder check, signal in good time, and move to the edge before you brake.
- Use both brakes, and build the force up rather than grabbing at the front lever.
- Keep the machine upright and the bars straight through the whole stop.
- Pull the clutch in just before you come to rest, or the engine stalls.
- Change down as you brake, so you are in first gear when the machine stops — ready to go again.
- Put your left foot down and keep the right one on the rear brake — then it stands still on a hill too.
- Leave it in gear while you wait, so you can move off without going hunting.
Low speed, turning round and parking
Self-balance grows with speed, which means it is weakest exactly where you are moving slowest: in the car park, in the queue, in the gateway and when you turn round. It is also where most drops happen. They rarely cost more than a mirror and some pride — but they happen because the technique is a different one from riding at speed.
At walking pace it is the clutch, the rear brake and your eyes that keep the machine up — not speed.
- Hold the clutch in the friction zone and let the engine pull steadily, rather than snatching at it.
- Trail a little rear brake at the same time. It gives the machine something to pull against and the lurching stops.
- Look where you are going, well ahead. Look down at the front wheel and that is where you will end up.
- Do not use the front brake on full lock — that drops the machine to the inside.
Turning round
Turning round is both a balance problem and a give-way situation. Under trafikkreglene § 11, whoever turns round must give way to other road users, and if the view is not good enough you must not turn unless someone is watching out or you have made sure yourself that no danger can arise. Turning round is prohibited on motorways and motor roads and on their slip roads. Choose a place with good sight and room, and assume nobody else is watching out for you while you do it.
Wheeling it
Wheeling the machine by hand is part of manoeuvring. Walk beside it, both hands on the bars, the gearbox in neutral, and use the front brake to stop it. Moving it backwards, you still hold both grips and look where you are going. Once a machine has started to fall away from you it is not coming back — so keep it leaning lightly towards you rather than pushing it away. Nor does wheeling it make you a pedestrian: trafikkreglene § 2 counts someone leading a bicycle or a moped as a pedestrian, but a motorcycle is not on the list.
Parking
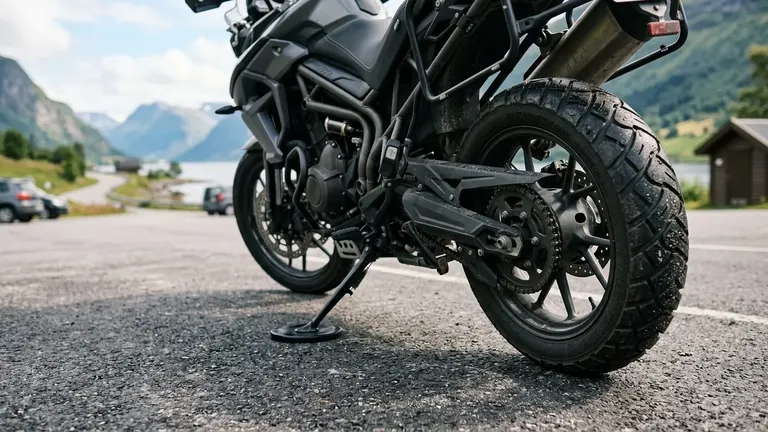
The main stand carries the machine itself. The side stand lets it lean — on one small point.
On the side stand the machine leans to the left on one small foot. The ground under that foot decides whether it stays up.
- The main stand holds the machine upright and lifts the rear wheel clear of the ground. It is what you use to lubricate the chain, or when the machine will stand for a long time.
- The side stand is quicker, which is why you use it most. It lets the machine rest leaning to the left on a single small point, and there the ground decides everything.
- On a slope, park with the front wheel pointing uphill. Pointing downhill, the machine can roll forward and tip off the stand.
- Roll the machine off the main stand forwards, not backwards, and hold the bars with both hands while you do it.
- Choose firm, level ground. Soft earth, gravel and hot tarmac all give way under the stand foot.
- Leave it in gear when it is on the side stand, so it cannot roll off.
- Park so that you can ride out again without having to push it backwards up a slope.
- If the surface is doubtful, put something hard and flat under the stand foot — a plate, a board, not a stone that can tip.
When the machine has gone over
A motorcycle that has gone down in a car park or in gravel has to come back up, and it weighs more than your arms can lift. It is righted with your legs and your body weight, not your back — and the technique is worth having thought through before you are standing there.
- Switch the ignition off first, and put the machine in gear so it cannot roll once it is up.
- If it is lying on its right side, put the side stand down before you start. Otherwise it has nothing to rest on as it passes vertical.
- Turn the bars fully towards the side the machine is lying on, put your back against the seat, and take one grip on the lower handlebar grip and one on the frame or under the seat.
- Push with your legs and walk backwards in small steps. Keep your back straight — you are pushing, not lifting.
- If you cannot do it alone, wait for help. A machine that slips halfway up is worse than one lying still.
Hills and obstacles
Manoeuvring is a theme of its own in class A, and two of the situations it covers are the ones that most often drop a new rider: pulling away uphill, and crossing something that sticks up out of the road.
The hill start
On an uphill the machine has to be held still while the clutch takes up. If you cannot do both at once you roll backwards the moment your foot leaves the ground — and a motorcycle rolling backwards uphill is heavy to save.
- Hold the machine on the rear brake: right foot on the pedal, left foot on the ground. That leaves your right hand free for the throttle.
- Let the clutch out to the friction zone, and feel the machine want to move before you release the brake.
- Release the brake and add throttle in the same movement. Slightly too many revs costs less than too few.
- If the engine stalls, press the rear brake at once, select neutral, restart and begin again.
- If the hill is so steep that your wheel is against a kerb, turn the machine round and ride out downhill instead.
The clutch takes up first, the brake is released after — not the other way round.
Downhill
Downhill, gravity does what the throttle did going up. Speed builds by itself, the weight shifts forward so the rear wheel has even less to work with, and the stopping distance is longer than it is on the flat. Choose your gear before you start down, not on the way.
- Ride a lower gear than you would use on the flat at the same speed, and let engine braking do part of the work.
- Use the brakes in short, firm applications rather than trailing them the whole way down. A steady drag heats them until they work less well — and you find out just when you need them.
- Do not ride down with the clutch in or in neutral. Engine braking is then gone, and everything rests on two brakes you already have a use for.
- If the hill has a bend in it, the entry speed is settled further up than you think. Take the speed off before the road starts to fall.
Over an obstacle
A kerb, a hump, a rail or a lip left by roadworks are all the same problem: a small wheel meeting something that sticks up. A car feels it in the seat; you feel it in the bars — and the bars are what can be knocked out of your hands.
- Slow down before it, not on it. Braking as the front wheel meets the lip makes the impact harder.
- Meet it as close to a right angle as you can, and upright.
- Rise slightly off the seat, knees bent and against the tank, and let your legs take the hit instead of your back.
- Hold both grips firmly, and do not rest your fingers on the brake or clutch lever — a knock through the bars then becomes an unintended handful of brake.
- Look where you are going next, not down at the lip.
- If you have hit something hard, stop and check the tyre and rim before riding on. A dented rim can let the air out later.
Right angle, upright, up off the seat — and no brake as the wheel makes contact.