
Class A theory course · chapter 5 of 19
Forces, balance and braking
Self-balance, countersteering and throttle control, how weight shifts under braking, the choice between braking and steering around, and what load and a passenger do.
The chapter in numbers
- Lessons
- 3about 15 minutes of reading
- Drawings
- 8diagrams and photographs made for the lessons they sit in
- Terms
- 5words explained where they are first used
Why this chapter
What keeps a motorcycle upright, makes it turn and brings it to a stop is physics you have to understand – not just feel. This chapter explains balance, how you actually get the machine to turn, what happens to the weight when you brake, and how a passenger and load change the picture – and the hardest choice in an emergency: brake or steer around.
Written against
The lessons are written against these sources, and the explanations cite them.
- Læreplan klasse A2 (V850a2) pkt. 2.1.4, 2.2.4 og definisjonene (styrekommando, svingpunkt, gasskontroll, forankringspunkter)
- Læreplan klasse A2 (V850a2) pkt. 2.1.4, 2.2.2, 2.2.5 og 3.3 (sikkerhetskurs i presis kjøreteknikk)
- kjøretøyforskriften § 2-6
- Læreplan klasse A2 (V850a2) pkt. 2.1.4 og 3.1.5
- definisjonen av handlingsberedskap
- læreplan V850a2 pkt. 3.3.5 (bremsing i sving)
What the test asks
The practice questions for this chapter belong to 2 of the seven official themes of the theory test.
- Speed & positioning277 practice questions · 7 of 40 in our mock exam
- Driver & owner responsibility154 practice questions · 4 of 40 in our mock exam
The mock-exam split is our own – Statens vegvesen publishes none.
The lessons, in order
- 1 Balance and cornering forcesWhy the machine stays up by itself, why it must lean to turn, and what happens when you lay it over. 5 min
- 2 Braking, load and passengerKinetic energy and stopping distance, how weight shifts, and what a passenger or luggage does to the machine. 5 min
- 3 Brake or steer around itThe choice between braking and steering around, why the two cannot be done at once, and how the swerve is ridden. 5 min
The lessons are part of full access – 139 kr for a week, 199 kr for a month. Chapter 1 is free, so you can see how the course is written first.
All 19 chapters
- 01The motorcycle and the licence
- 02The motorcycle — construction and systems
- 03Clothing and compulsory safety equipment
- 04The motorcycle safety check
- 05Forces, balance and braking
- 06Manoeuvring — low speed, starting and stopping
- 07Positioning and cornering
- 08Observation, where you look, and being seen
- 09Grip, weather and road conditions
- 10Signs, markings and signals
- 11At a traffic accident
- 12The traffic rules and the rider's duties
- 13Motorway, tunnel and level crossing
- 14The rider's and owner's responsibility
- 15Risk, attitudes and riding strategy
- 16Giving way
- 17Speed, distance and overtaking
- 18Environment and consideration
- 19Passenger and load
Read the whole chapter
Full access opens all 19 chapters, mock exams with new questions every time and the sign drill – 139 kr for a week, 199 kr for a month, no automatic renewal.
Balance and cornering forces
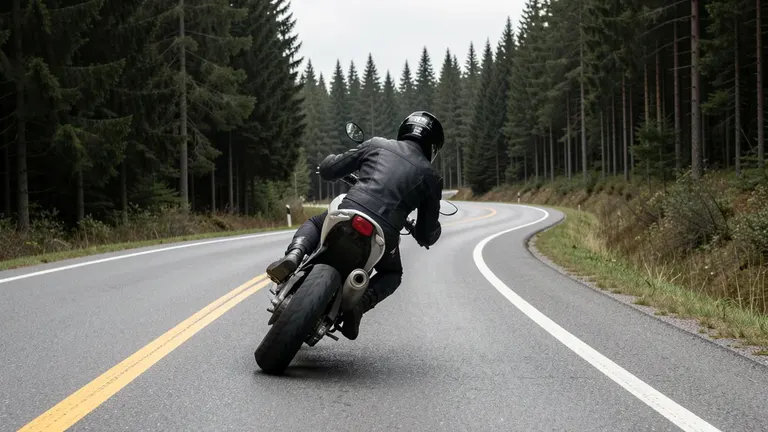
A car turns because its wheels point where it is going. A motorcycle turns because it leans. That is the fundamental difference, and nearly everything else in motorcycle theory follows from it.
Self-balance
At speed the machine keeps itself upright. The spinning wheels, the centre of gravity and the geometry at the front — how far the forks are raked and how much trail there is — work together so that the machine seeks its way back to upright. This self-stability grows with speed. That is why a machine at walking pace is unsteady and demands balancing work from you, while at open-road speed it almost resists being laid over.
The lean is not a style — it is the only attitude in which the forces balance.
The force that holds you in the bend grows with the square of speed: double the speed into the same bend needs four times the side force — and far more lean. That is why "a little too fast" into a bend is never just a little.
Countersteering
In a bend the tyres run on the shoulder of the tread. The lean is not optional — it follows from the speed and the radius.
To lay the machine over in the direction you want to turn, you push the handlebar forward on the side you are turning towards. It sounds back to front, but it is how a two-wheeled motorcycle is laid over at speed, and it is the term the curriculum uses: styrekommando.
Push the bar forward on the side you are turning towards. The machine leans, and turns.
Throttle control through the bend
The tyre is rounded in profile. As the machine leans it rolls on a narrower part of the tyre and the rolling circumference shrinks. With a steady, light throttle through the bend you compensate for this and hold the machine steady at the lean you set with the countersteering input. The curriculum also points out that throttle control helps decide whether the machine understeers or oversteers: shut the throttle abruptly mid-bend and the weight moves forward and the machine tightens its line.
Gyroscopic effect: The resistance a spinning wheel offers to having its axis of rotation changed. It is one of several reasons the machine becomes harder to lean over the faster it goes.
Grip is shared between turning and braking. Leaned over, most of it is already spent.
Riding position and anchor points
The læreplan treats riding position and anchoring as part of the physics, not as comfort. The anchor points are where you and the machine touch — feet on the pegs, knees against the tank, the seat and your hands on the bars — and they are what lets you steer the machine rather than hang on to it.
- Squeeze the tank lightly with your knees. Then your legs carry you under braking instead of your arms.
- Loose arms with a slight bend at the elbow, and a firm but not hard grip on the bars. Stiff arms fight the machine’s own directional stability.
- Sit so that you reach every control without stretching or shifting in the seat.
- Shoulders loose, head up. A gaze locked on the tarmac in front of the wheel locks the body too.
- The balls of your feet on the footrests, toes pointing forward. Then your toe does not touch down in a lean, and you do not press the gear lever or the brake without meaning to. Never rest your foot on the brake pedal — the brake light stays on and the brake heats up until it fades.
Anchor points: The points where rider and machine are in contact, and which let you operate and steer the motorcycle as safely as possible.
Braking, load and passenger
A vehicle's kinetic energy grows with the square of its speed. Double the speed and four times as much energy must be shed before you stop — and the braking distance grows accordingly. That is as true on two wheels as on four; the difference is that a motorcycle has less rubber on the road to do it with.
Braking distance on dry, bare asphalt, both brakes, machine upright. Leaned or loaded, you need more.
Weight transfer
Weight goes forward under braking: the front wheel gains grip, the rear loses it.
Under braking, weight is thrown forward. The front wheel is pressed down and gains grip; the rear goes light and loses it. That is why the front brake does most of the work, and why the rear locks easily if you use the pedal hard. Under acceleration the opposite happens: weight goes rearwards and the front wheel goes light.
The curriculum builds braking skill up step by step. In step 2 you learn a smooth, controlled stop using both brakes. On the safety course in precise riding technique for classes A2 and A you brake from 80 km/h at a set point with a stable line, and there the braking should be close to optimal for the grip available. You also practise braking from about 50 km/h down to walking pace inside a right-hand and a left-hand bend. Braking right up to the limit without locking a wheel is called threshold braking — and you only get the feel of it by practising it.
High-side: A fall in which a rear wheel that has been sliding sideways — after a locked rear brake or too much throttle in a lean — suddenly regains grip. The machine snaps upright and flings the rider off over the top. It is why a rear brake that has already put the back out of line is held until the machine stops, and why the throttle is rolled off smoothly, not shut.
Threshold braking: Braking as hard as the surface allows without locking a wheel — right up to the limit but on the right side of it. It takes braking force that is built up and adjusted as you go, not applied in one grab.
Passenger and load
A passenger or luggage changes the machine noticeably: the centre of gravity moves, usually higher and further back, the machine becomes harder to lean over and to pick up, the stopping distance grows and the front wheel goes lighter under acceleration. The registration document states the unladen weight and the permitted maximum weight, and the machine with rider, passenger and luggage must not weigh more than that maximum. The payload is what remains once the unladen weight and 75 kg for the rider are taken off — it is a limit, not a recommendation.
- Load heavy items low and close to the machine's centre; high or rearward loads make the steering unstable.
- Secure the load so it cannot shift — a load that moves in a bend moves the centre of gravity mid-bend.
- The passenger must wear an approved helmet and their own protective equipment, and should sit still and follow the machine's movements.
- Adjust suspension and tyre pressure to the manufacturer's figures when carrying a passenger.
Brake or steer around it
Something is suddenly in your path. You have two ways out: brake until you stop, or steer around it. On a motorcycle that is a choice, not a combination — and it has to be made before you act, because both use the same grip and you only have one set of tyres.
Grip between tyre and road is a budget. Braking spends it lengthways, turning spends it sideways, and the sum cannot exceed what the tyre has. Brake while you lay the machine over into a swerve and you are asking for both at once — which is exactly when the tyre lets go.
Brake then steer, or steer then brake — never both at once.
That does not mean you can never brake with the machine leaned. On the safety course you practise exactly that, braking inside a bend, and it has its own technique — see below. The rule here is about the swerve: it needs all of the grip to move the machine sideways.
The swerve
A swerve is two steering commands one after the other: one that lays the machine over and moves you sideways, and one that stands it up again on the new line. Your body stays as still as it can while the machine moves beneath you — the less you hang on to it, the faster it comes back.
- Hold the throttle steady through the swerve. Any speed comes off before you steer — rolling off mid-swerve is engine braking, and it throws the weight forward just as the front tyre has to carry the side force.
- Press forward on the grip on the side you want to go, then press just as firmly on the other side to stand it up again.
- Knees against the tank, feet on the footrests. Without that anchor your upper body does not come with the machine and it will not lay over.
- Look at the gap you are going through, not at the obstacle. That habit is what decides whether you make the gap.
When is braking the answer?
- When you have room to stop. Braking is simpler, it is more predictable for those behind you, and it asks less of you.
- When you do not know what the hazard will do next. A car pulling out may stop in the middle of your lane — and the gap you steered for is gone.
- When the surface is poor. Wet, gravel or a cold tyre leaves you little budget to split between braking and turning, and what little you have is spent most safely straight ahead.
When you have to stop inside the bend
Brake with the machine leaned and it will stand up and run on a wider arc — the harder you brake, the stronger the effect. That is physics, not a mistake on your part, and it is why braking in a bend pulls you towards the centre line in a right-hander and towards the road edge in a left-hander.
- Straighten first, then brake. If you have room, bring the machine upright with the bars straight, then brake hard as you would on a straight.
- Brake leaned, and build it up. If you have no room, start gently with both brakes while the machine is still leaned, and add force as it comes upright. Keep your eyes through the bend — not on what you are trying to avoid.
- Whichever you use, the machine should be upright with the bars straight when it comes to rest. Otherwise it falls to the inside.
Brake leaned and the machine stands up and runs wide. Straighten first if there is room — otherwise build the braking up as the lean comes off.
Swerve: Two quick steering commands in succession that move the machine sideways past an obstacle and stand it up again. It is ridden without brakes, because the grip is already being spent on turning.