
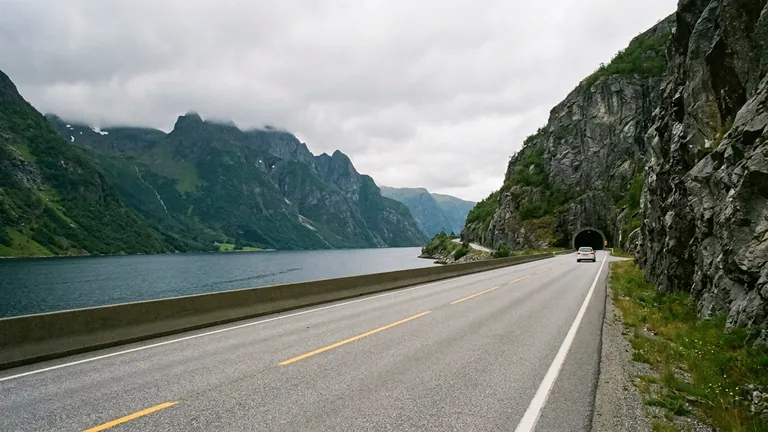
Class B theory course · chapter 5 of 22
The road and the traffic environment
Road types, carriageway and lanes, and what the road markings mean.
The chapter in numbers
- Lessons
- 3about 13 minutes of reading
- Drawings
- 9diagrams and photographs made for the lessons they sit in
- Exam tips
- 3passages that say what the test tends to ask here
- Terms
- 3words explained where they are first used
Why this chapter
The road tells you a lot before any sign does. This chapter covers how roads are built and classified, what the markings mean, and how bends, crests, junctions and tunnels change what you can see and how much time you have. Reading the traffic environment is half the job.
Written against
The lessons are written against these sources, and the explanations cite them.
- Læreplan klasse B
- vegvesen.no
- Trafikkreglene
- Skiltforskriften
- vegvesen.no – vegoppmerking
What the test asks
The practice questions for this chapter belong to 2 of the seven official themes of the theory test.
- Speed & positioning236 practice questions · 7 of 45 in our mock exam
- Signs & road markings283 practice questions · 9 of 45 in our mock exam
The mock-exam split is our own – Statens vegvesen publishes none.
The lessons, in order
- 1 Road types and traffic environmentsThe most common road types – from residential streets to motorways – and what characterises driving on each of them. 5 min
- 2 Carriageway, lane and hard shoulderWhat the different parts of the road are called, and where on the road you should drive. 4 min
- 3 Road markingsWhat the yellow and white lines mean, and the difference between a solid and a broken line. 4 min
The lessons are part of full access – 149 kr for a week, 199 kr for a month. Chapter 1 is free, so you can see how the course is written first.
All 22 chapters
- 01Introduction
- 02The human in traffic
- 03The car – construction and systems
- 04Checks and maintenance
- 05The road and the traffic environment
- 06The traffic rules and basic duties
- 07Signs, signals and police directions
- 08Giving way and right of way
- 09Observation and communication
- 10Positioning and lane use
- 11Speed, distance and braking distance
- 12Junctions and roundabouts
- 13Overtaking and meeting
- 14Different roads and surroundings
- 15Light and road-surface conditions
- 16Other road users
- 17Stopping and parking
- 18Eco-friendly driving
- 19Load and trailer
- 20The driver's responsibility
- 21At a traffic accident
- 22Risk and attitudes
Read the whole chapter
Full access opens all 22 chapters, mock exams with new questions every time and the sign drill – 149 kr for a week, 199 kr for a month, no automatic renewal.
Road types and traffic environments
The road you are driving on tells you a lot about how you should drive. Speed level, the number of road users, junctions and pedestrians vary greatly between a narrow residential street and a wide motorway. Reading the road environment and adapting to it is a basic skill.
The road is more than the asphalt
In the traffic rules, the road is the whole area open to general traffic. It may include the carriageway, shoulder, pavement, pedestrian and cycle facilities and areas at junctions. You must therefore read both what you drive on and what lies close to the carriageway.
Common road types
| Road type | Characteristics |
|---|---|
| Residential street | Low speed, children and vulnerable road users, many exits. Be prepared for the unexpected. |
| Urban street / town centre | Dense traffic, pedestrian crossings, bicycles, public transport and frequent junctions. |
| Rural road | Higher speed, oncoming traffic, blind bends and hill crests. |
| Semi-motorway (motor traffic road) | Driving at high speed, often one lane in each direction and oncoming traffic – be especially careful when overtaking. |
| Motorway | Separate lanes in each direction, grade-separated junctions, no oncoming traffic and no vulnerable road users. |
How the road environment changes risk
| Environment | What to expect | Safe adaptation |
|---|---|---|
| Residential and school area | Children, parked cars, hidden exits and short sight lines | Low speed, foot ready at the brake, good side clearance |
| Urban street | Many simultaneous signals: lights, lane arrows, buses, cyclists and pedestrians | Plan lane choice early and avoid sudden lane changes |
| Rural road | High speed, oncoming traffic, animals, tractors and visibility that changes quickly | Keep right, adapt speed before bends/hill crests, wait with overtaking |
| Motorway | High pace and large distances, but fewer conflict points | Use the acceleration lane, keep distance and return right after overtaking |
Tunnels and bridges
Tunnels and bridges are environments of their own, added on top of whichever road type you are driving on, and they carry hazards the table above does not cover.
- Tunnel: the light changes abruptly from daylight to darkness and back again. Take off your sunglasses before the entrance, drive with dipped headlights, ease off the speed and keep a good distance to the car ahead while your eyes adjust.
- Bridge: a bridge is cooled from both sides and ices up before the rest of the road – expect ice on a bridge even when the asphalt before and after it is bare. Open bridges are also exposed to side wind, so hold the wheel firmly and be ready for a gust as you drive onto and off the bridge.
The hazard in a residential street is what you cannot see between the parked cars.
Gravel roads and roads without a hard surface
A large part of the Norwegian road network has no hard surface. A gravel road behaves differently from asphalt: the loose layer on top acts like ball bearings between the tyre and the firm ground beneath, and both braking distance and steering get worse long before you feel it through the wheel.
- The braking distance becomes noticeably longer than on dry asphalt, and the wheels lock more easily.
- Loose gravel collects on the outside of bends and along the middle – exactly where you end up if you take the bend too fast.
- Corrugations – washboard ripples across the road – make the tyres lose contact with the surface for brief moments. In those moments you have neither steering nor brakes.
- Rain makes a gravel road slippery, and dry weather brings dust that hides oncoming traffic.
- The shoulder is often soft and can give way under the wheel if you drift too far out.
Motorway: A road built for fast and safe driving with separate carriageways, grade-separated junctions and no vulnerable road users or oncoming traffic.
Carriageway, lane and hard shoulder
To understand the rules on positioning and road markings, you need to know some fixed terms. They are used in signs, in rules and in the theory test, so it pays to know them clearly.
Parts of the road
| Term | Meaning |
|---|---|
| Road | The whole area intended for traffic, including the carriageway, pavement and shoulder. |
| Carriageway | The part of the road intended for driving vehicles. |
| Lane | One of the longitudinal lanes into which a carriageway may be divided. |
| Hard shoulder | The outer area, outside the lane. Not intended for normal driving. |
| Centre line | Separates traffic in opposite directions. |
| Edge line | Marks the outer edge of the lane. |
Learn the names once: the rest of the rules use them throughout.
Lanes can exist without markings
A lane is in practice room for one line of vehicles. If the carriageway is wide enough for two lines in the same direction, there may be two lanes even without markings. You must still position sensibly, show clearly where you are going, and not squeeze in beside others where the width is not safe.
Pavement, shoulder and separate lanes
| Part | Characteristics | What does it mean for you? |
|---|---|---|
| Pavement | Normally raised above the carriageway and separated by a kerb | Do not use it for driving or stopping in a way that obstructs pedestrians |
| Shoulder | Area outside the edge line, often on roads without pavement | Not for driving a car: only bicycles, small electric vehicles and vehicles that are not motor vehicles may use it (§ 5 nr. 1). Used for emergency stops. If you are driving slowly with a queue behind you, you must if necessary move over to the right and slow down or stop (§ 12 nr. 4) — preferably at a passing place or lay-by. |
| Cycle lane along the carriageway | Signs and markings give cyclists their own area | Look for cyclists before crossing or turning over the lane |
| Pedestrian and cycle path | Physically separated by ditch, verge, fence or distance | Expect crossing traffic where it meets roads and exits |
Several lanes in the same direction
If there are two or more lanes in your direction, choose a lane according to speed and where you are going. Change lanes only when it is clear, signal, and move back to the right when you have finished overtaking.
The left lane is for overtaking – move back to the right when you have finished.
Recognise the junction type early: its shape tells you where the conflicts will come from.
Lane: A longitudinal section of the carriageway, wide enough for one line of cars, often marked with road markings.
Road markings
Road markings are part of the traffic rules. Lines, hatched areas and symbols tell you where to drive, when you may change lanes, and where you must not drive or stop. Reading the markings correctly is just as important as reading the signs.
Longitudinal markings: a broken line may be crossed, a solid line must not be crossed.
Longitudinal lines
| Line | Meaning |
|---|---|
| Broken centre line | You may change lanes or overtake when it is clear and safe. |
| Solid centre line | You must not cross or drive to the left of the line. |
| Solid + broken line side by side | The rules apply to the lane nearest you: if your line is broken, you may cross; if it is solid, you must not. |
| Edge line | Marks the outer edge of the carriageway. |
| Hatched area | A hatched area that you must not drive on or stop in. |
A yellow line means oncoming traffic on the other side; a white edge line shows the outer edge.
When the line warns, not only regulates
A long broken yellow line with short gaps is used as a warning line. It is not an absolute ban on crossing, but it tells you that visibility or conditions may soon be too poor for overtaking. The correct reaction is to become more critical, not to think “it is still allowed”.
The warning line comes before the solid line – by then it is too late to start an overtake.
| Marking | Typical place | Correct judgement |
|---|---|---|
| Warning line | Before a hill crest, bend or other area with short visibility | Avoid overtaking unless you have full overview and good margin |
| Solid line | Where crossing normally creates too much risk | Do not cross or drive to the left of the line |
| Combined solid/broken | Where visibility differs for each direction | Follow the line nearest you, not the one for oncoming traffic |
| Broken edge line on narrow road | Where there is not room for clear separate lanes | Keep well right, but be ready for oncoming traffic near the middle |
A hatched area keeps traffic streams apart – it is not an extra lane.
Transverse markings and symbols
- Stop line: this is where you must stop at a stop sign or red light.
- Give-way line (shark teeth): triangular symbols that show where you have a duty to give way.
- Pedestrian crossing: wide transverse stripes where pedestrians should cross.
- Arrows in the lane: show which direction the lane leads to – follow the arrow in your lane.
Markings across your lane say where to stop, to yield or to let others pass.
Hatched area: A hatched area on the road that you must not drive into, stop in or cross.